21 Disney Nail Ideas: Classy Disney Nails for Every Fan
Published: 27 Oct 2026
Disney nail ideas are a fun way to bring a little magic to your hands, whether you’re heading to the parks, watching a new movie, or just love the classics. The best part is that Disney nails don’t have to look childish. With the right colors and small details, you can create sets that feel elegant, grown-up, and still full of personality.
This list mixes playful and polished looks. You’ll find tiny Mickey ear silhouettes, red and black polka dot sets, princess-inspired color palettes, castle and firework accents, glamorous villain nails, Pixar-inspired touches, and soft pastel designs. Many of these classy Disney nails use subtle symbols instead of full cartoon characters, so they work for everyday wear too.
I picked 21 nail ideas Disney fans can actually do, with steps, real products, and honest notes. Most designs use a dotting tool, a fine brush, and a few classic colors. Choose one theme, add one or two accent nails, and keep the rest simple so the magic stands out.
In this Disney nail ideas guide, you’ll get:
- 21 classy Disney nails from subtle to bold
- Mickey, princess, castle, villain, and Pixar-inspired ideas
- Real products I’d actually use
- One honest note per idea so you know what to expect
- Tools, common mistakes with fixes, and aftercare tips
If you want nails that feel magical but still stylish, start with the quick snapshot below.
Quick Snapshot: Disney Nails at a Glance
| Best for | Short to medium oval, almond, squoval, or square nails |
| Difficulty | Easy to medium |
| Time | 25 to 60 minutes |
| Lasts | 5 to 7 days with polish, 2 to 3 weeks with gel |
1. Tiny Mickey Ears on Nude
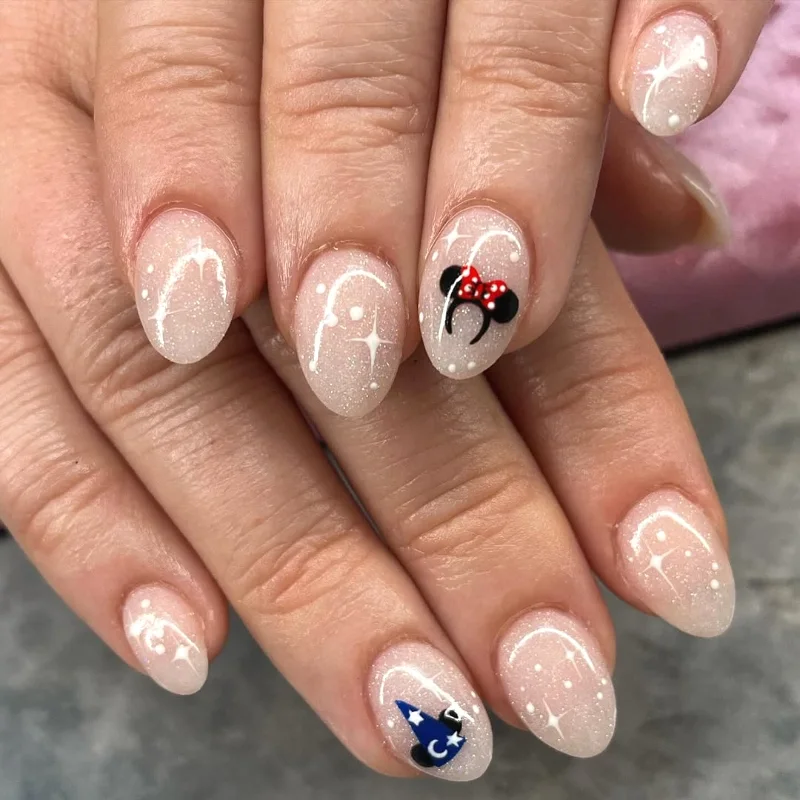
Tiny Mickey ears on a nude base are the easiest classy Disney nails you can do. Dot one large black circle and two smaller circles on top to form the famous silhouette. Place it near the tip or cuticle of one accent nail. The rest of the nails stay sheer and glossy, so the set feels subtle and grown-up.
How to do it:
- Apply a base coat and let it dry.
- Apply a sheer nude base.
- Dot a black Mickey silhouette on one nail.
- Seal with a glossy top coat.
Products and colors: Base coat, a nude like Essie Ballet Slippers, a black like Essie Licorice, a dotting tool set, top coat.
Honest note: The ears can look uneven. Dot the head first, then the ears at equal angles.
2. Red and Black Polka Dots
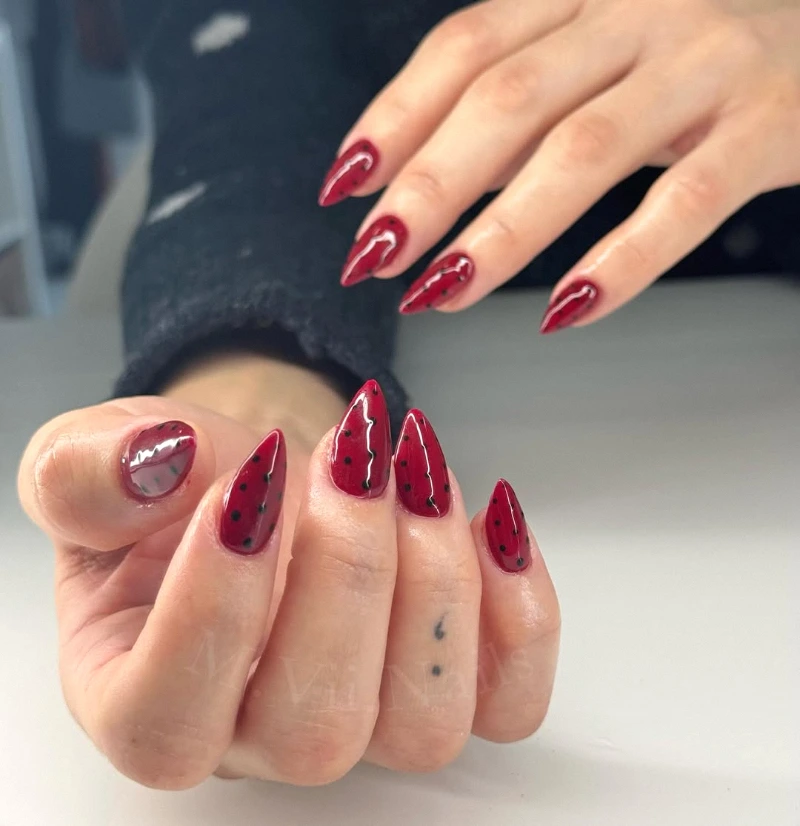
Red and black polka dot nails take inspiration from a classic red dress with white dots. Paint red nails with white dots and add one glossy black accent with a tiny bow. These Disney nail ideas are bright, cheerful, and easy. They’re perfect for a park day or a Disney movie night with friends.
How to do it:
- Apply a base coat and let it dry.
- Paint red nails with white polka dots.
- Paint one black accent nail.
- Add a small red bow on the accent.
- Seal with a glossy top coat.
Products and colors: Base coat, a red like OPI Big Apple Red, white and black polish, a dotting tool, top coat.
Honest note: Dots can drift. Use the same dotting tool for every dot.
3. Cinderella Ice Blue
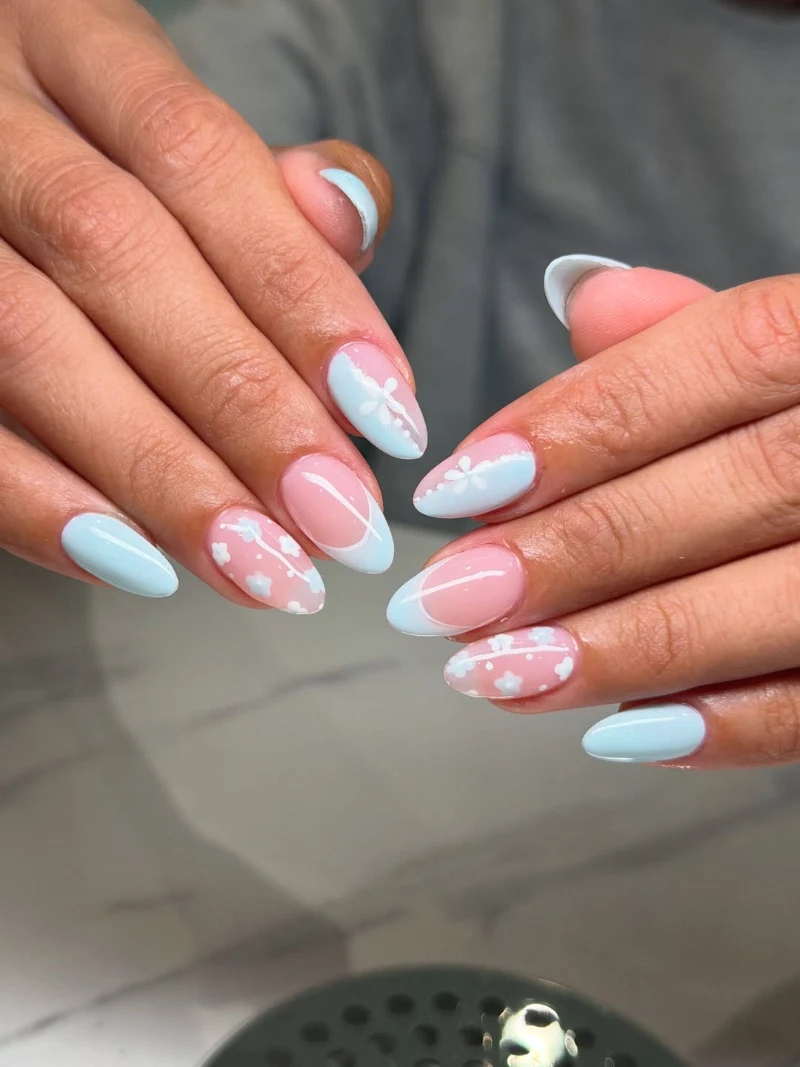
Cinderella-inspired nails use a soft ice blue base with silver glitter and a tiny glass slipper or sparkle accent. The look is dreamy and elegant. These classy Disney nails are perfect for weddings, proms, and birthdays. Add a thin silver line at the cuticle for a delicate royal finish. It feels like a true fairytale moment.
How to do it:
- Apply a base coat and let it dry.
- Apply two coats of ice blue.
- Add silver glitter to one accent nail.
- Paint a tiny silver slipper or star.
- Seal with a glossy top coat.
Products and colors: Base coat, an ice blue like Essie Borrowed and Blue, a fine silver glitter polish, silver striping polish, top coat.
Honest note: Light blue can streak. Use thin coats.
4. Little Mermaid Ocean Nails
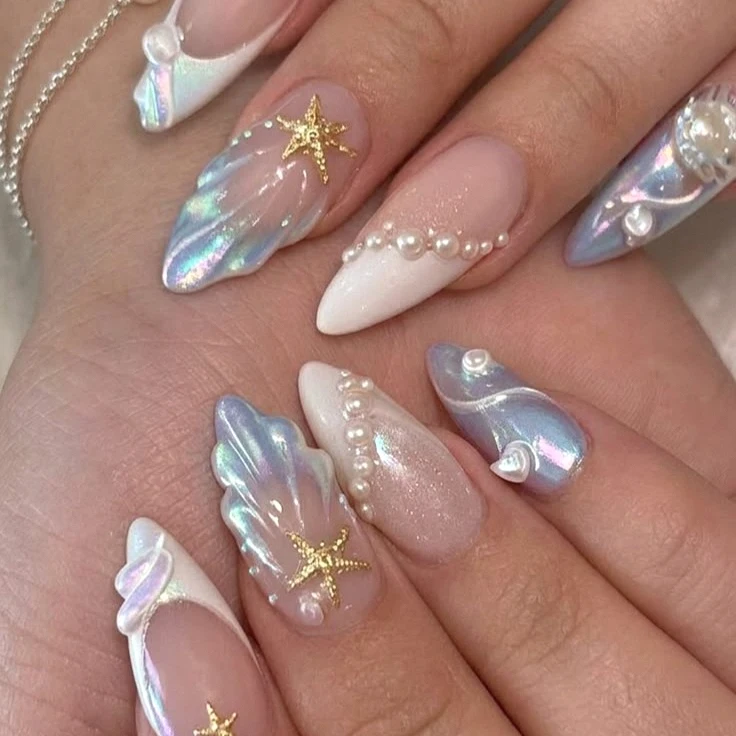
Little Mermaid-inspired nails mix sea green and purple with a shimmery mermaid scale texture. Add a tiny seashell or pearl on one accent nail. These Disney nail ideas feel like an underwater fairytale. Use a mesh or fishnet stencil to create easy scales with a sponge. A holographic top layer adds an extra ocean shimmer.
How to do it:
- Apply a base coat and let it dry.
- Paint sea green and purple nails.
- Sponge scales through a mesh stencil.
- Add a pearl or shell accent.
- Seal with a glossy top coat.
Products and colors: Base coat, sea green and lavender polish, a holographic polish, a mesh stencil, small pearls, nail glue, top coat.
Honest note: Pearls can snag. Seal around them well.
5. Beauty and the Beast Rose
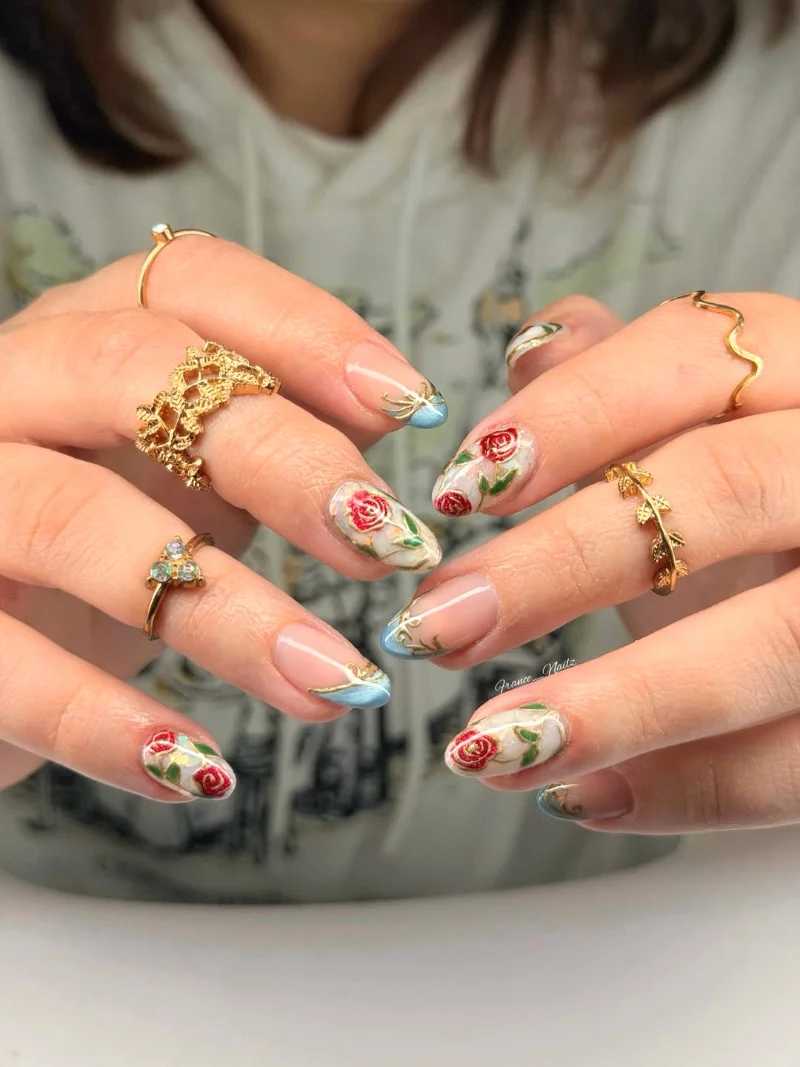
Beauty and the Beast nails pair a golden yellow base with a single red rose on one accent nail. A thin gold line or tiny sparkle adds elegance. These classy Disney nails feel romantic and storybook. Use a fine brush for the rose petals and keep it small for a refined look.
How to do it:
- Apply a base coat and let it dry.
- Paint a golden yellow base.
- Paint a small red rose on the accent nail.
- Add tiny gold sparkle dots.
- Seal with a glossy top coat.
Products and colors: Base coat, a golden yellow polish, red and green polish, gold striping polish, a fine brush, top coat.
Honest note: Roses take practice. Try a rose decal instead.
6. Castle Silhouette Accent
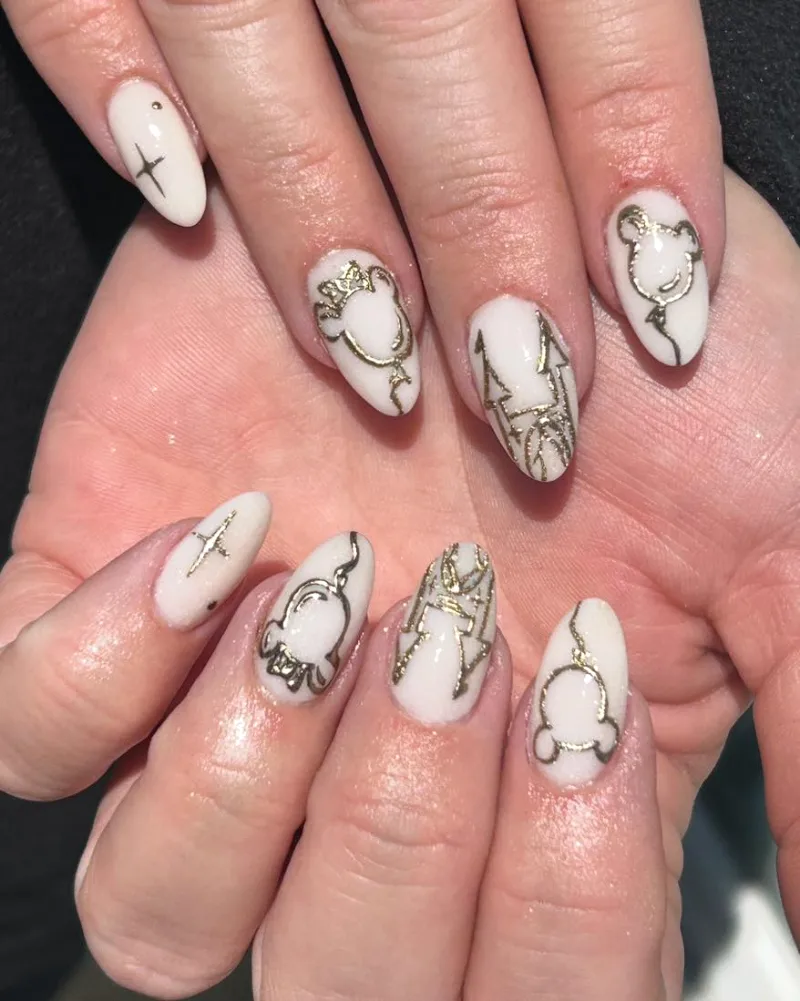
A castle silhouette accent paints a small dark castle shape on a gradient sunset or night sky base. The look is iconic and magical. These nail ideas Disney fans love feel like a park evening. Use a castle stencil or decal for clean towers, then add tiny white stars. It’s a lovely choice for a first park visit.
How to do it:
- Apply a base coat and let it dry.
- Sponge a pink to purple gradient.
- Add a castle stencil silhouette in black.
- Dot tiny stars.
- Seal with a glossy top coat.
Products and colors: Base coat, pink and purple polish, a makeup sponge, black polish, castle nail decals, top coat.
Honest note: Freehand castles are hard. Use a decal or stencil.
7. Fireworks Over the Park
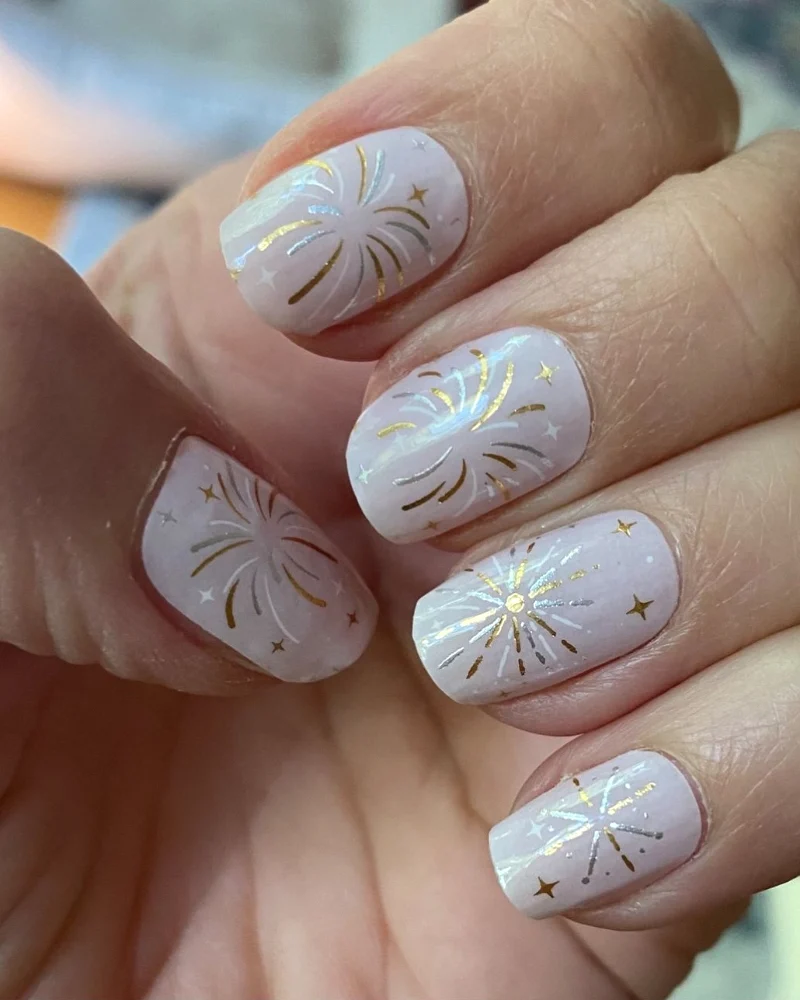
Firework nails paint bursts of gold, pink, and blue on a navy base. Pair them with one castle accent for a full park night look. These Disney nail ideas are perfect for evening shows and celebrations. Use a striping brush to flick lines out from a center dot. The colors glow beautifully in photos.
How to do it:
- Apply a base coat and let it dry.
- Apply a navy base.
- Paint firework bursts with striping lines.
- Add a small castle accent.
- Seal with a glossy top coat.
Products and colors: Base coat, a navy polish, gold, pink, and blue striping polish, a fine brush, top coat.
Honest note: Bursts can look messy. Keep lines short and thin.
8. Villain Glam Nails
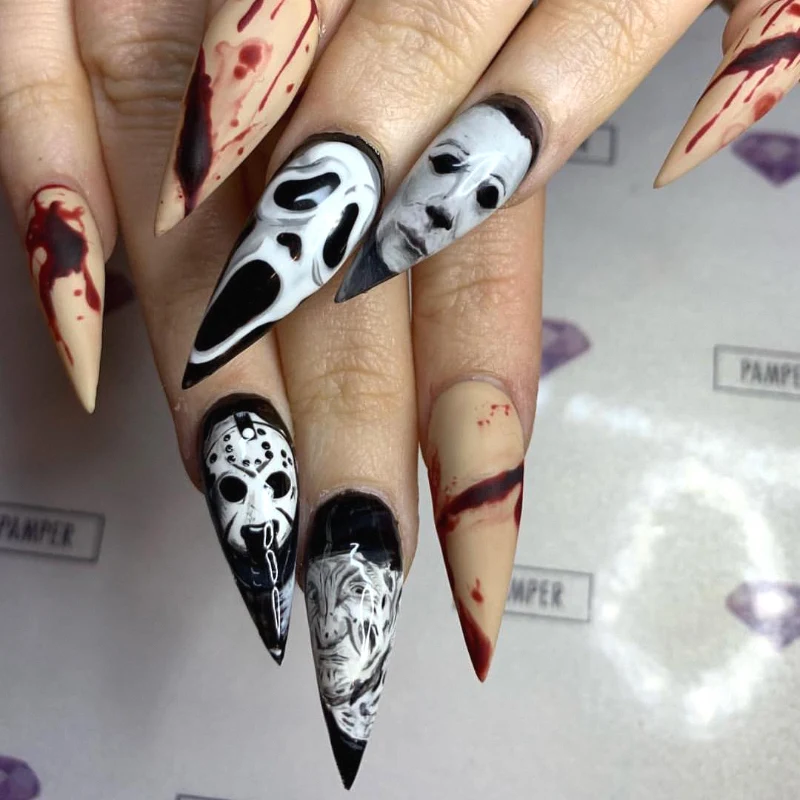
Villain glam nails use deep purple, black, and emerald with silver or gold details. Think of an evil queen or sea witch vibe. These classy Disney nails are dramatic and chic. Add a tiny poison apple or crown on one nail. They’re great for Halloween and villain-themed parties. They feel bold and a little mysterious.
How to do it:
- Apply a base coat and let it dry.
- Paint nails in black, purple, and emerald.
- Add a tiny apple or crown accent.
- Add gold or silver details.
- Seal with a glossy top coat.
Products and colors: Base coat, black, deep purple, and emerald polish, gold striping polish, a fine brush, top coat.
Honest note: Dark colors show chips. Apply top coat every few days.
9. Princess Pastel Palette
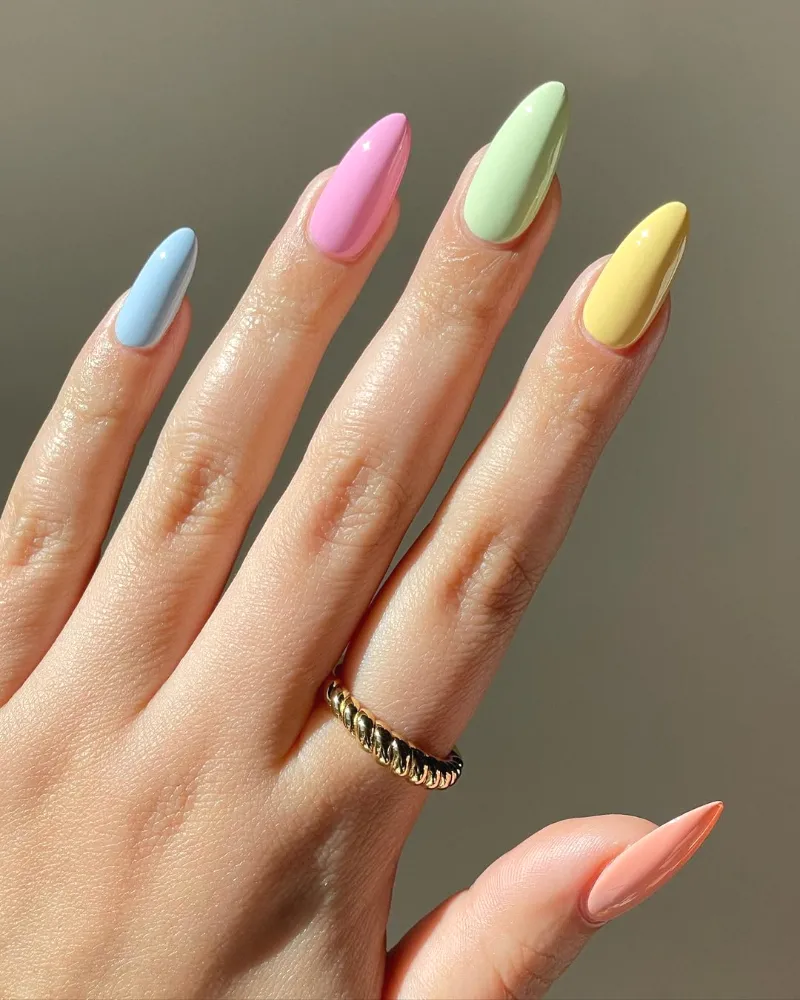
Princess pastel nails give each nail a soft color inspired by a different princess gown: blush pink, ice blue, buttercup yellow, lavender, and mint. Add a tiny crown on one nail. These Disney nail ideas are sweet and subtle. They look classy because no full characters are painted. It’s a soft, grown-up way to show fandom.
How to do it:
- Apply a base coat and let it dry.
- Paint each nail a different pastel.
- Add a tiny gold crown on one nail.
- Seal with a glossy top coat.
Products and colors: Base coat, pastel pink, blue, yellow, lavender, and mint polish, gold striping polish, top coat.
Honest note: Pastels can streak. Use two thin coats.
10. Minnie Bow Nails
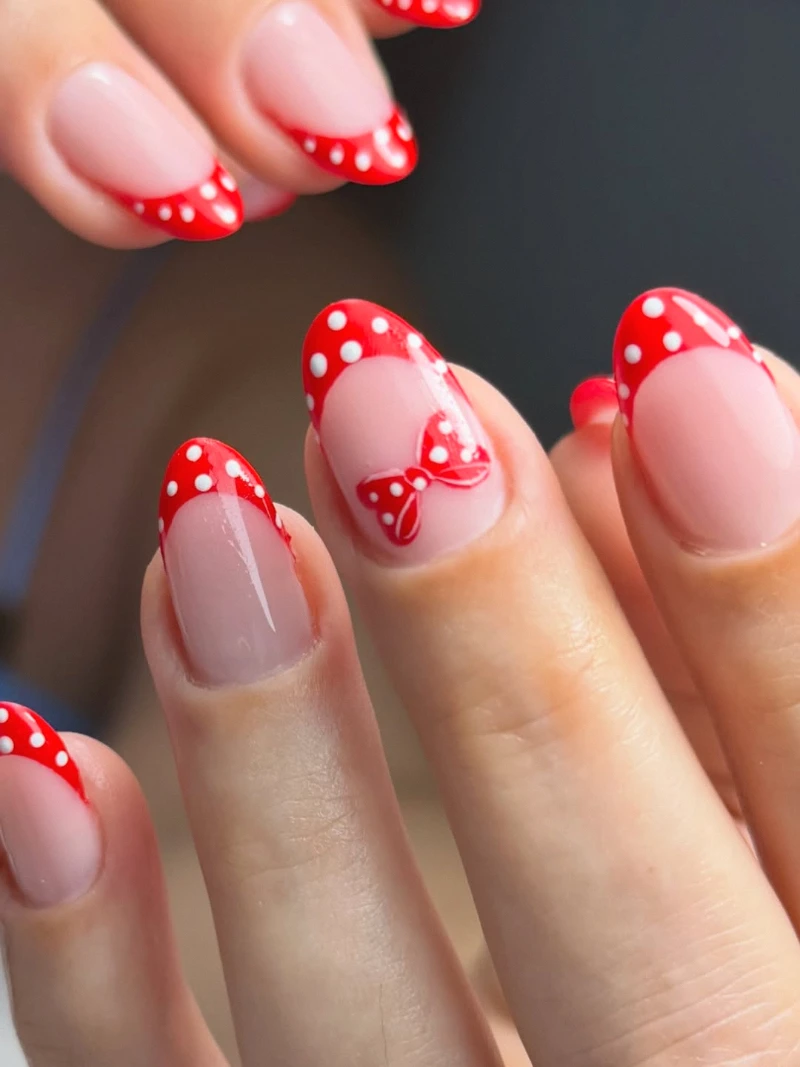
Minnie bow nails add a small red or pink bow on top of Mickey ear silhouettes. The look is cute and playful. These Disney nail ideas suit kids and adults. Pair the bow nail with polka dot nails and solid red. Use a dotting tool to make the bow from two triangles and a dot.
How to do it:
- Apply a base coat and let it dry.
- Paint a black ear silhouette.
- Add a red bow on top.
- Dot white polka dots on the bow.
- Seal with a glossy top coat.
Products and colors: Base coat, black, red, and white polish, a dotting tool, a fine brush, top coat.
Honest note: Bows can look lumpy. Paint two small triangles and a center dot.
11. Frozen Snowflake Nails
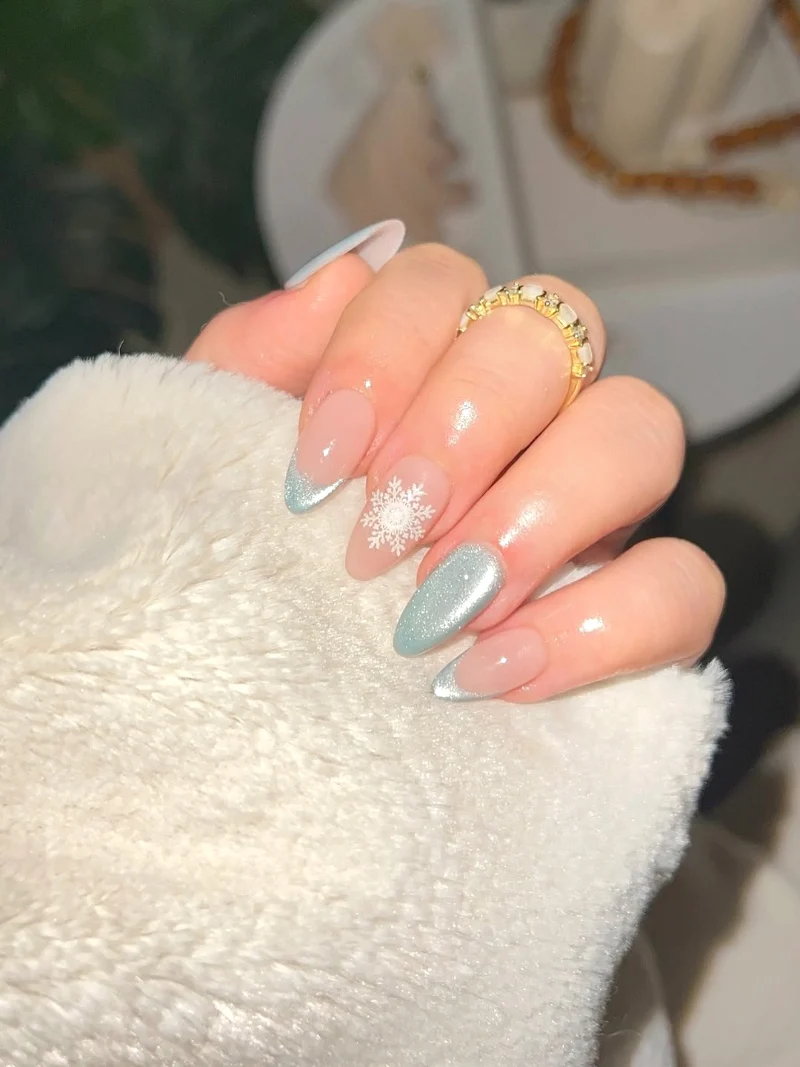
Frozen-inspired nails paint icy blue and white nails with silver snowflakes. The look is wintry and magical. These Disney nail ideas are perfect for winter birthdays and holidays. Add a little silver glitter on one nail for a sparkling ice effect. Pair them with a silver ring for an icy, elegant finish that looks great all winter.
How to do it:
- Apply a base coat and let it dry.
- Apply icy blue and white polish.
- Paint silver snowflakes.
- Add silver glitter on one nail.
- Seal with a glossy top coat.
Products and colors: Base coat, icy blue and white polish, silver striping polish, a fine silver glitter, top coat.
Honest note: Snowflakes need thin lines. Use a liner brush.
12. Toy Story Clouds
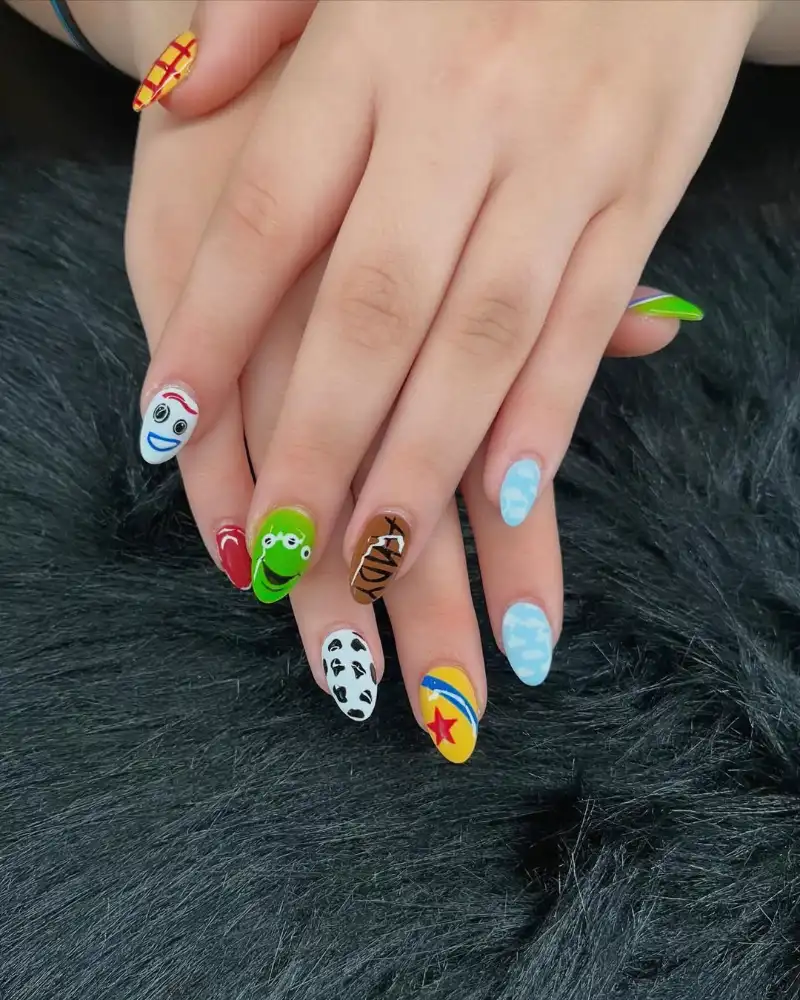
Toy Story-inspired nails paint fluffy white clouds on a sky blue base. The pattern is soft and nostalgic. These Disney nail ideas are a fun nod to Pixar without painting characters. Use a dotting tool to build each cloud from overlapping circles. It’s a gentle, cozy design that feels nostalgic and works for all ages.
How to do it:
- Apply a base coat and let it dry.
- Apply a sky blue base.
- Dot white clouds with a dotting tool.
- Seal with a glossy top coat.
Products and colors: Base coat, a sky blue polish, white polish, a large dotting tool, top coat.
Honest note: Clouds can look flat. Vary the dot sizes.
13. Up Balloon Nails
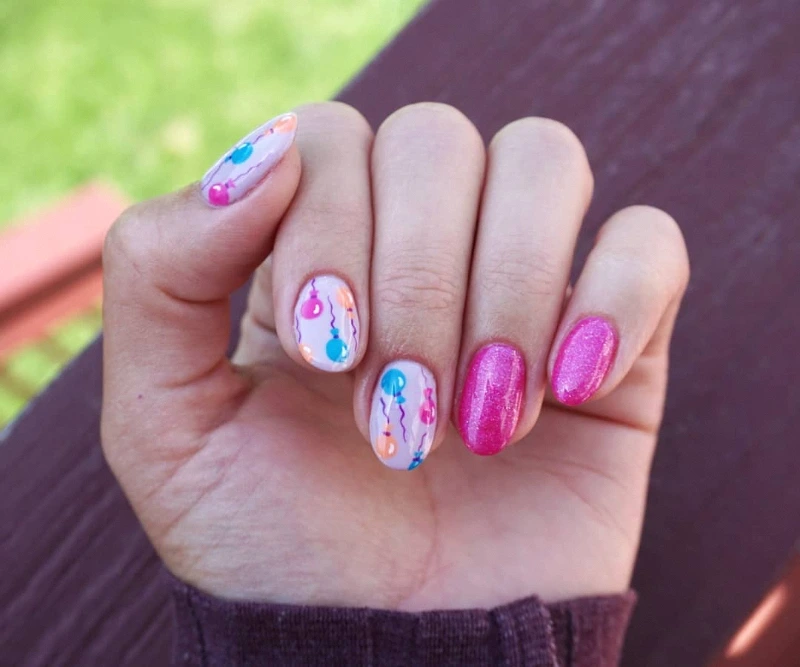
Up-inspired nails paint tiny colorful balloons on a nude or sky blue base. Add a thin white string to each balloon. These Disney nail ideas are cheerful and sentimental. Use bright dots in red, yellow, blue, and green. Keep them small and clustered near the tip. It’s a sweet nod to adventure and love.
How to do it:
- Apply a base coat and let it dry.
- Apply a sky blue base.
- Dot small colorful balloons.
- Add thin white strings.
- Seal with a glossy top coat.
Products and colors: Base coat, sky blue polish, bright polishes, white striping polish, a dotting tool, top coat.
Honest note: Strings can look thick. Use a very thin brush.
14. Tinker Bell Sparkle
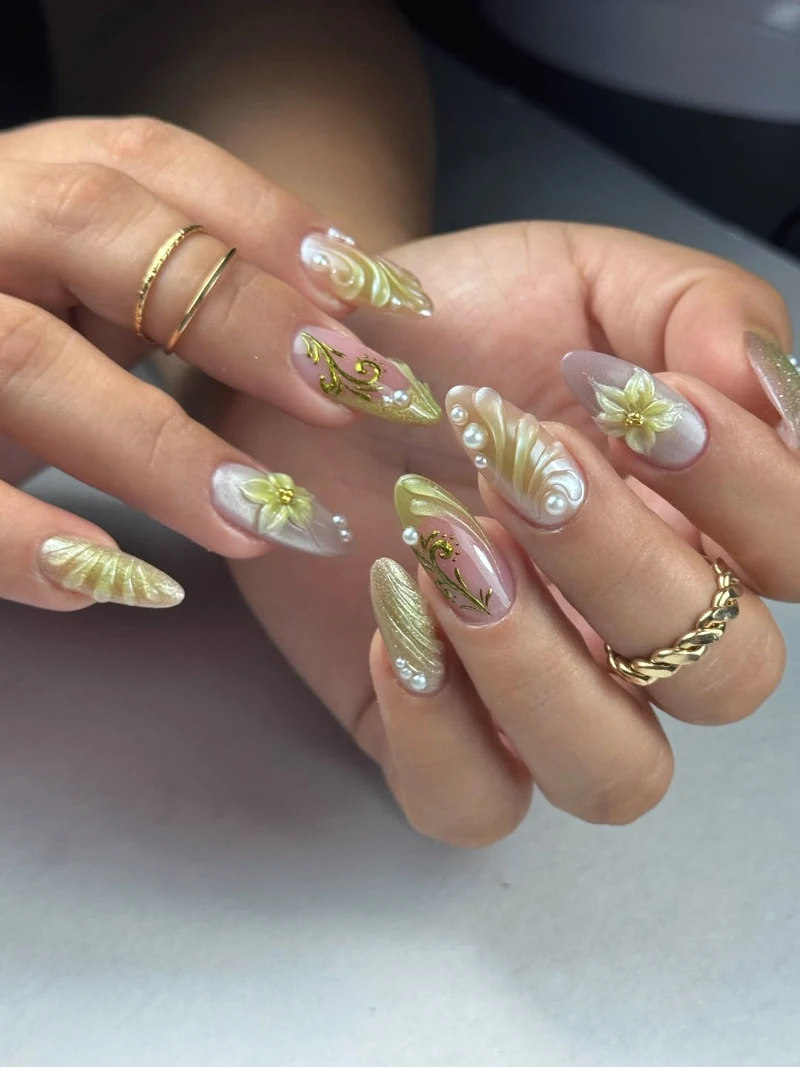
Tinker Bell-inspired nails mix soft green with gold pixie dust glitter. Add tiny gold stars on one accent nail. These classy Disney nails feel magical and sparkly. Use a fine gold glitter for a clean finish. They’re perfect for birthdays and fairy-themed parties. Gold rings and a soft blush outfit complete the dreamy look.
How to do it:
- Apply a base coat and let it dry.
- Paint soft green nails.
- Add fine gold glitter.
- Paint tiny gold stars.
- Seal with a glossy top coat.
Products and colors: Base coat, a soft green polish, fine gold glitter polish, gold striping polish, top coat.
Honest note: Glitter is hard to remove. Use the foil method.
15. Mickey Ears French Tips
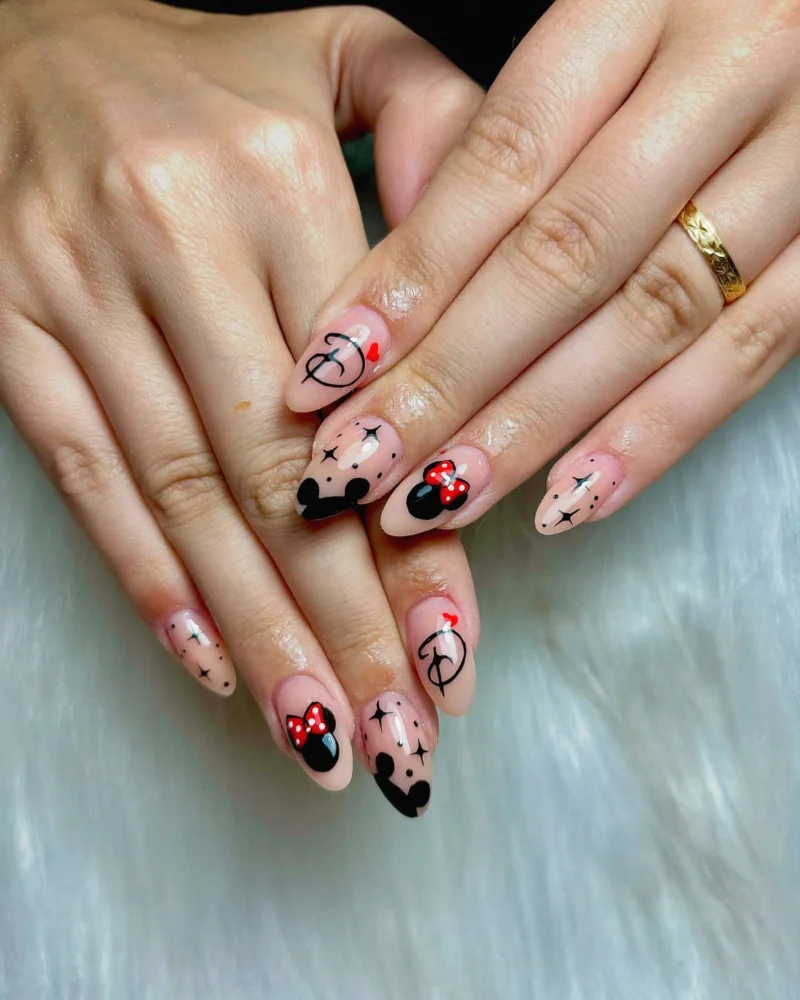
Mickey ears French tips paint black tips with tiny ears popping up from the smile line. The look is clever and subtle. These classy Disney nails look like simple French tips from far away. Up close, the ears show the Disney theme. Try them on short almond nails. It’s a smart pick for work days.
How to do it:
- Apply a base coat and let it dry.
- Apply a sheer nude base.
- Paint black French tips.
- Add tiny ear dots on each tip.
- Seal with a glossy top coat.
Products and colors: Base coat, a sheer nude polish, black polish, a small dotting tool, top coat.
Honest note: Ears need even spacing. Mark spots first.
16. Aladdin Jewel Tones
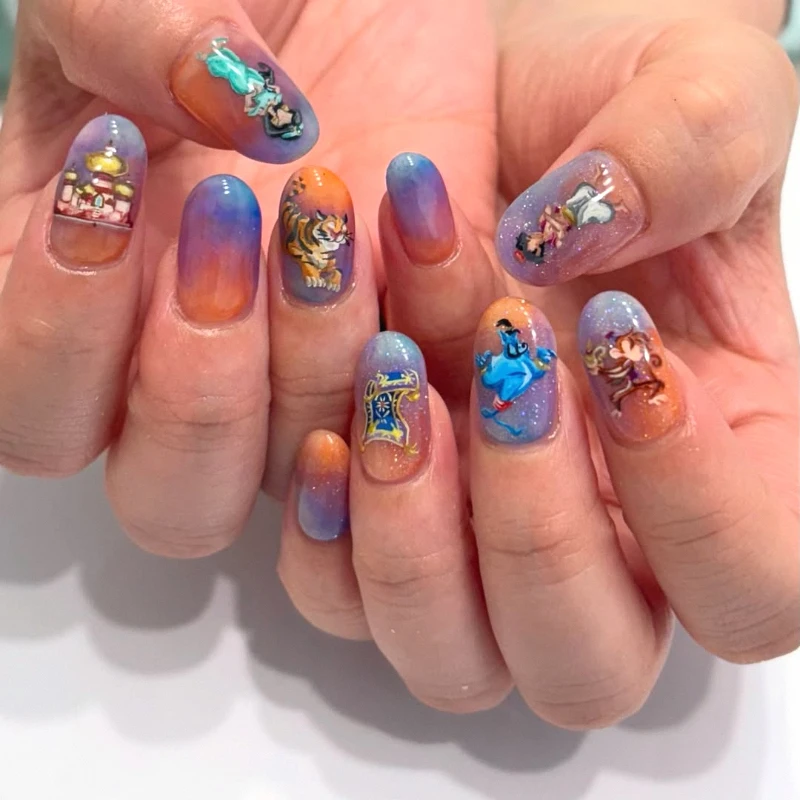
Aladdin-inspired nails use teal, gold, and purple jewel tones with a tiny magic lamp accent. The look is rich and luxe. These Disney nail ideas feel elegant and exotic. Add small gold dots and swirls for an ornate touch. They pair well with gold rings. It looks rich next to warm skin tones.
How to do it:
- Apply a base coat and let it dry.
- Paint teal and purple nails.
- Add gold swirls.
- Paint a tiny gold lamp accent.
- Seal with a glossy top coat.
Products and colors: Base coat, teal and purple polish, gold striping polish, a fine brush, top coat.
Honest note: Lamps are tricky. Use a decal for a clean shape.
17. Lion King Sunset
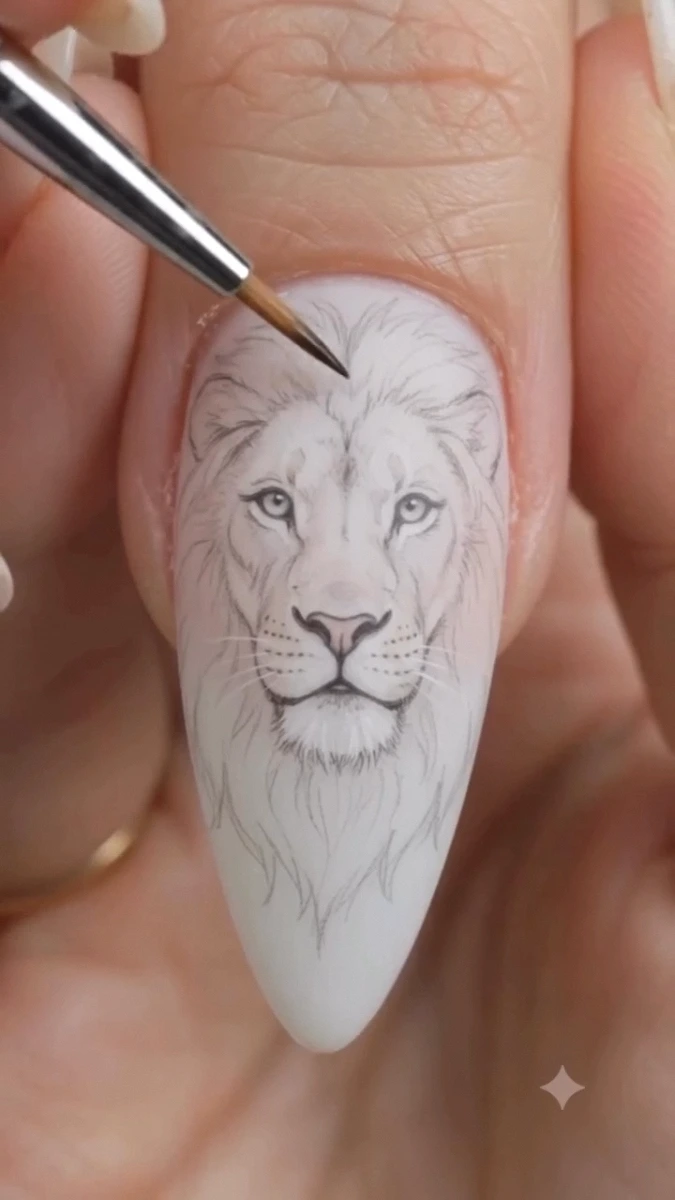
Lion King-inspired nails paint an orange and yellow sunset gradient with a black tree or rock silhouette. The look is warm and dramatic. These Disney nail ideas feel like an African savanna. Use a makeup sponge for the fade and a fine brush for the silhouette. The bold contrast makes a striking statement.
How to do it:
- Apply a base coat and let it dry.
- Sponge an orange to yellow gradient.
- Paint a black tree silhouette.
- Seal with a glossy top coat.
Products and colors: Base coat, orange and yellow polish, a makeup sponge, black striping polish, top coat.
Honest note: Gradients get messy. Use liquid latex around the cuticle.
18. Matte Black Mickey
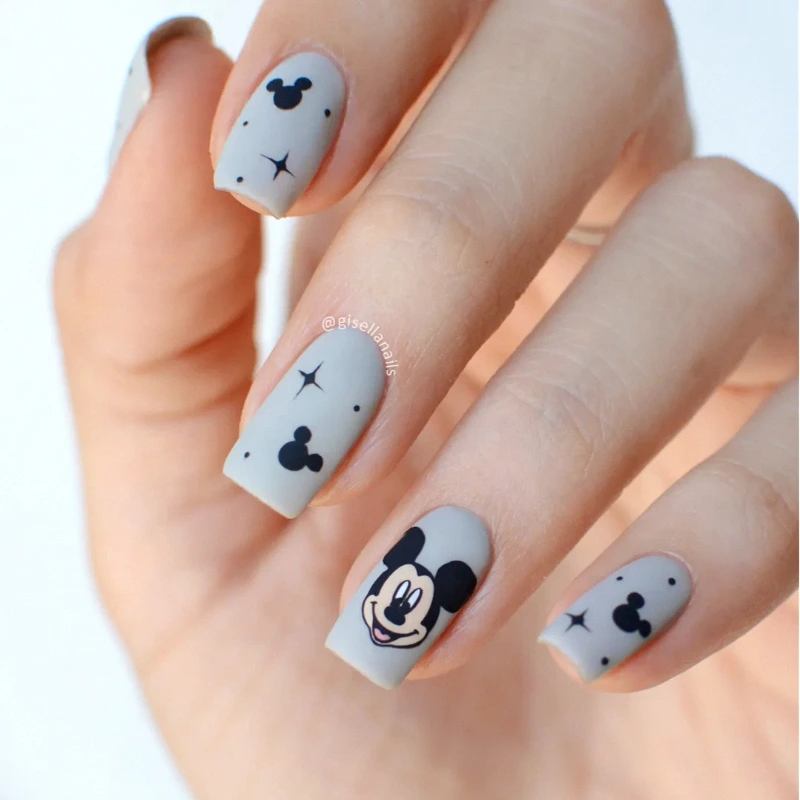
Matte black Mickey nails pair a matte black base with glossy Mickey ear silhouettes on top. The finish contrast is subtle and chic. These classy Disney nails are perfect for adults who want something stylish. Paint the glossy silhouettes with top coat only for a tone-on-tone look. It’s the most grown-up look on this list.
How to do it:
- Apply a base coat and let it dry.
- Apply two coats of black.
- Apply a matte top coat.
- Paint glossy Mickey silhouettes with top coat.
Products and colors: Base coat, black polish, a matte top coat, a glossy top coat, a dotting tool.
Honest note: Matte shows wear faster. Reapply every few days.
19. Rose Gold Mickey Chrome
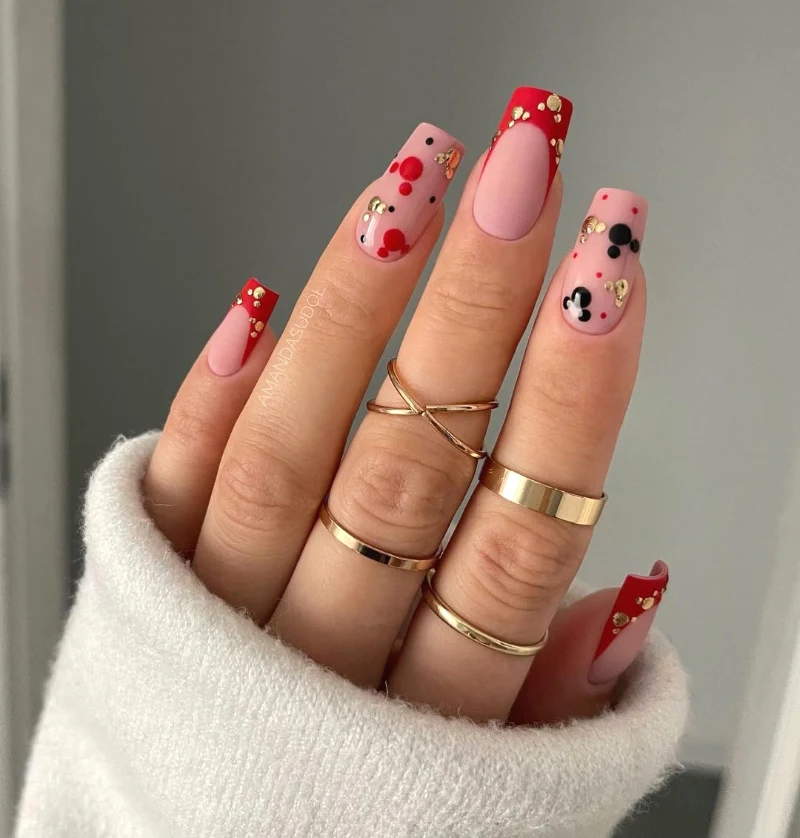
Rose gold Mickey nails use rose gold chrome with a tiny Mickey silhouette on one nail. The look is luxe and modern. These classy Disney nails are perfect for a special park visit or a Disney-themed wedding. Use gel for the chrome so it stays smooth. It also makes a lovely bridal accent.
How to do it:
- Apply gel base coat and cure.
- Apply nude gel and cure.
- Buff rose gold chrome over no-wipe top coat.
- Add a Mickey silhouette with gel and cure.
- Seal with gel top coat and cure.
Products and colors: Gel base coat, nude gel, no-wipe top coat, rose gold chrome powder, black gel paint, an LED lamp.
Honest note: Chrome needs gel. Book a salon if you don’t have a lamp.
20. Disney Sticker Nails
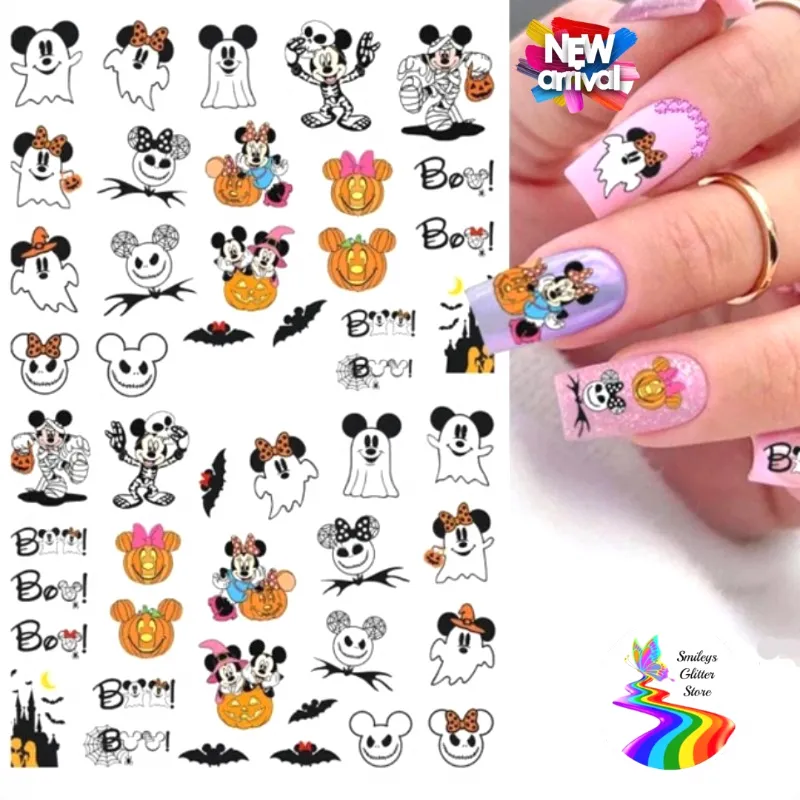
Disney sticker nails use water decals for clean character art. They’re perfect when you want detailed designs fast. These Disney nail ideas take only a few minutes. Apply decals over a solid nude, white, or pastel base and seal well. Pick one character per accent nail. Choose small decals so the set still feels classy.
How to do it:
- Apply a base coat and let it dry.
- Apply a solid base color.
- Add Disney-themed decals.
- Seal with a glossy top coat.
Products and colors: Base coat, a solid polish, Disney nail decals, tweezers, top coat.
Honest note: Stickers can lift. Seal the edges with two coats.
21. Disney Mix and Match
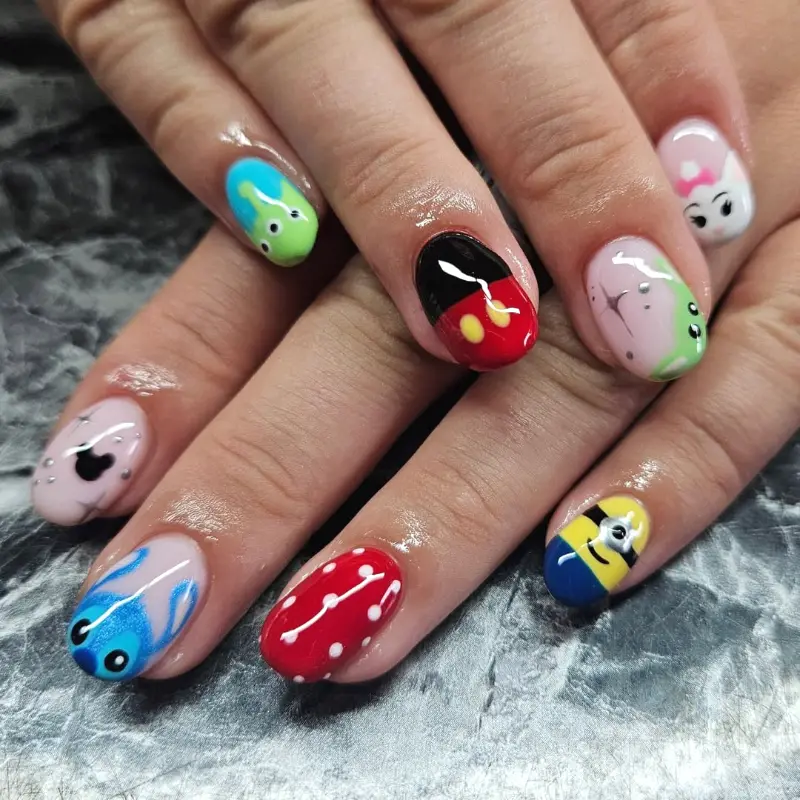
A Disney mix and match set puts a different theme on each nail. Try Mickey ears, a castle, polka dots, a princess crown, and a sparkle nail. These Disney nail ideas show off your favorite moments in one set. Keep a shared base color so it still feels classy. It’s a fun way to celebrate a big trip.
How to do it:
- Apply a base coat and let it dry.
- Pick five Disney themes.
- Paint a different design on each nail.
- Seal with a glossy top coat.
Products and colors: Base coat, nude, red, black, white, and gold polish, a dotting tool, top coat.
Honest note: This set takes time. Book a salon if you want it fast.
Tools and Products for Classy Disney Nails
These are the basics I use for Disney nail ideas at home.
| Tool or product | What I use | Why it matters |
|---|---|---|
| Base and top coat | A strong base coat and glossy top coat | Long wear |
| Black polish | Essie Licorice | Mickey silhouettes |
| Red polish | OPI Big Apple Red | Polka dot sets |
| Nude polish | Essie Ballet Slippers | Classy base |
| Gold striping polish | A thin gold nail art polish | Crowns and details |
| Dotting tool | A dotting set | Ears and dots |
| Liner brush | A thin striping brush | Fine details |
| Disney decals | Water slide nail decals | Character art |
| Cuticle oil | CND SolarOil | Healthy cuticles |
Common Mistakes with Disney Nails (and How to Fix Them)
Uneven Mickey ears
Lopsided ears look off. Fix: Dot the head first, then place ears at matching angles.
Too many characters
Full characters on every nail look busy. Fix: Use one or two accents and simple symbols.
Streaky light colors
Pastels and ice blue streak. Fix: Use two thin coats and let each dry.
Smudged details
Top coat drags small art. Fix: Let art dry fully and float the top coat.
Childish look
Bright cartoons can feel too young. Fix: Use nude bases and subtle symbols for classy Disney nails.
Aftercare: How to Keep Disney Nails Looking Magical
Disney nails often get a lot of use during park days, so protection matters. Let your art dry fully for at least 30 minutes before using your hands. Add a thin layer of top coat every two to three days to protect small details. Wear gloves for dishes and cleaning. Apply cuticle oil every night, especially after long days in the sun. Avoid using your nails to open bottles or snack bags. Pack a mini top coat and nail file in your park bag for quick touch-ups between rides and shows. Rinse off sunscreen around your nails at the end of each day.
FAQ: Disney Nail Ideas
How do I make Disney nails look classy?
Use subtle symbols instead of full characters. Tiny Mickey ears on nude nails, princess-inspired pastel palettes, matte black with glossy silhouettes, and rose gold chrome all look elegant. Keep art to one or two accent nails and choose soft, neutral bases.
What are the easiest Disney nail ideas?
Tiny Mickey ear silhouettes, red and white polka dots, and princess pastel palettes are the easiest. They only need a dotting tool and a few colors. Disney water decals are another easy option for clean character designs in minutes. Stickers save time on busy mornings.
What nails should I get for a Disney trip?
Choose a long-lasting gel manicure with a subtle Disney accent, like Mickey ears or a castle silhouette. Short to medium nails are most practical for rides and walking. Bring a mini top coat and file for quick touch-ups during your trip.
Can I do Disney nails at home?
Yes. Most Disney nail ideas use simple dots, lines, and silhouettes you can paint with a dotting tool and liner brush. Start with one accent nail and use decals for detailed characters. Seal everything with top coat for longer wear.
How long do Disney nails last?
Regular polish lasts about five to seven days, while gel lasts two to three weeks. Park days with sunscreen and water rides can shorten wear. Add top coat every few days and wear gloves for chores to keep your Disney nails looking fresh.
Conclusion
So guys, in this article, we’ve covered Disney nail ideas in detail. From tiny Mickey ears on nude nails and red polka dots to princess pastels, castle silhouettes, villain glam, Pixar touches, and rose gold chrome, you now have 21 classy Disney nails to try. If you’re not sure where to start, I’d go with tiny Mickey ears on a nude base. It’s subtle, quick, and perfect for any Disney fan. Save this post for your next park trip, try one of these designs, and tell me in the comments which look you picked.


- Be Respectful
- Stay Relevant
- Stay Positive
- True Feedback
- Encourage Discussion
- Avoid Spamming
- No Fake News
- Don't Copy-Paste
- No Personal Attacks
- Be Respectful
- Stay Relevant
- Stay Positive
- True Feedback
- Encourage Discussion
- Avoid Spamming
- No Fake News
- Don't Copy-Paste
- No Personal Attacks
